
Uso Pessoal
Tomar melhores decisões de design
Seu espaço importa. Planejá-lo e projetá-lo pode ser desafiador, e é por isso que o Floorplanner existe. Acreditamos que planejar seu espaço não deveria ser difícil, caro ou exclusivo para profissionais. Deveria ser fácil, acessível, divertido e gratuito para todos. Desde 2007, nos comprometemos em construir uma plataforma para oferecer exatamente isso.
Junte-se a mais de 30 milhões de usuários em todo o mundo e descubra como o uso de plantas baixas e visuais em 3D pode ajudá-lo a ter mais confiança em todas as suas decisões de design e aproveitar ao máximo o seu espaço.

Ter uma planta baixa precisa do seu espaço é extremamente útil para tomar decisões de design informadas e evitar erros custosos. O editor do Floorplanner ajuda você a recriar rapidamente qualquer tipo de espaço em apenas alguns minutos, sem a necessidade de software ou treinamento. Desenhe seus quartos, mova paredes e adicione portas e janelas com facilidade para criar um Digital Twin do seu próprio espaço.
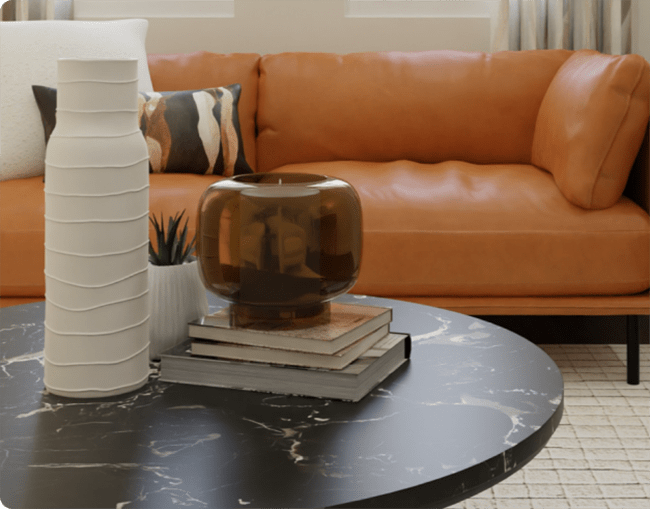
Com nossa visualização 3D em tempo real, você pode ver como suas escolhas de design ficarão no espaço final e até mesmo criar renders 3D de alta qualidade com impressionantes 8K de resolução.

A biblioteca do Floorplanner, com mais de 260.000 modelos 3D, está disponível para todos os nossos usuários sem custo adicional. Nossa biblioteca é vasta e diversificada, e inclui uma grande variedade de móveis adequados tanto para espaços residenciais quanto comerciais.
Você encontrará itens de marcas e fabricantes conhecidos, bem como itens mais gerais, como plantas, árvores, carros, elementos de sala de aula, itens de festa, piscinas e até mesmo um dinossauro em tamanho real!

A biblioteca do Floorplanner, com mais de 260.000 modelos 3D, está disponível para todos os nossos usuários sem custo adicional. Nossa biblioteca é vasta e diversificada, e inclui uma grande variedade de móveis adequados tanto para espaços residenciais quanto comerciais.
Acreditamos que um serviço como o Floorplanner pode e deve ser livremente acessível em algum formato básico e útil para todos no mundo, e é exatamente isso que oferecemos desde 2007 com nossa conta Básica.
NÃO vendemos nem sequestramos seus dados, e você pode continuar usando sua conta Básica gratuitamente pelo tempo que quiser. Ganhamos dinheiro vendendo créditos como uma compra única ou por meio de assinaturas. Esses créditos podem ser usados para atualizações de projetos e outros serviços adicionais em nossa plataforma.

O Floorplanner se tornou uma ferramenta indispensável e confiável para muitas pessoas em todo o mundo, perfeito para quem está planejando uma mudança ou com uma vontade repentina de redecorar seus espaços. Mesmo com uma conta gratuita, você ainda pode acessar e trabalhar em projetos iniciados anos atrás. Seus planos estão sempre lá para você.

O Floorplanner sempre foi gratuito para escolas desde o início em 2007. Foi incrível ver como milhões de alunos e milhares de escolas usaram nossa ferramenta como parte de suas lições e projetos.
Para facilitar ainda mais o uso do Floorplanner por professores e escolas, temos uma conta educacional especial. Esta conta é projetada para tirar o melhor proveito de nossa ferramenta em um ambiente educacional.


